Porcelain Paving Installation Failures – What Can Go Wrong and How to Get It Right
Why This Matters
Porcelain paving is one of the most beautiful and durable materials for modern patios—but only when installed correctly. Poor installation causes cracking, lifting, and complete failure within months, costing thousands to repair. This guide shows you what to look for before hiring an installer.
The Reality of Poor Porcelain Paving Installation
At Maybury Landscaping, we regularly encounter homeowners devastated by failed porcelain paving installations. A recent case involved a customer who paid £9,000 for approximately 67.5m² of porcelain paving. Within months, tiles began lifting, water pooled on the surface, and dark mortar stains appeared—clear evidence of substandard workmanship.
The images below document real installation failures we've assessed. These are not isolated incidents—they represent common problems when installers cut corners or lack proper training in BS 7533 standards.
Problem 1: Water Pooling and Inadequate Drainage
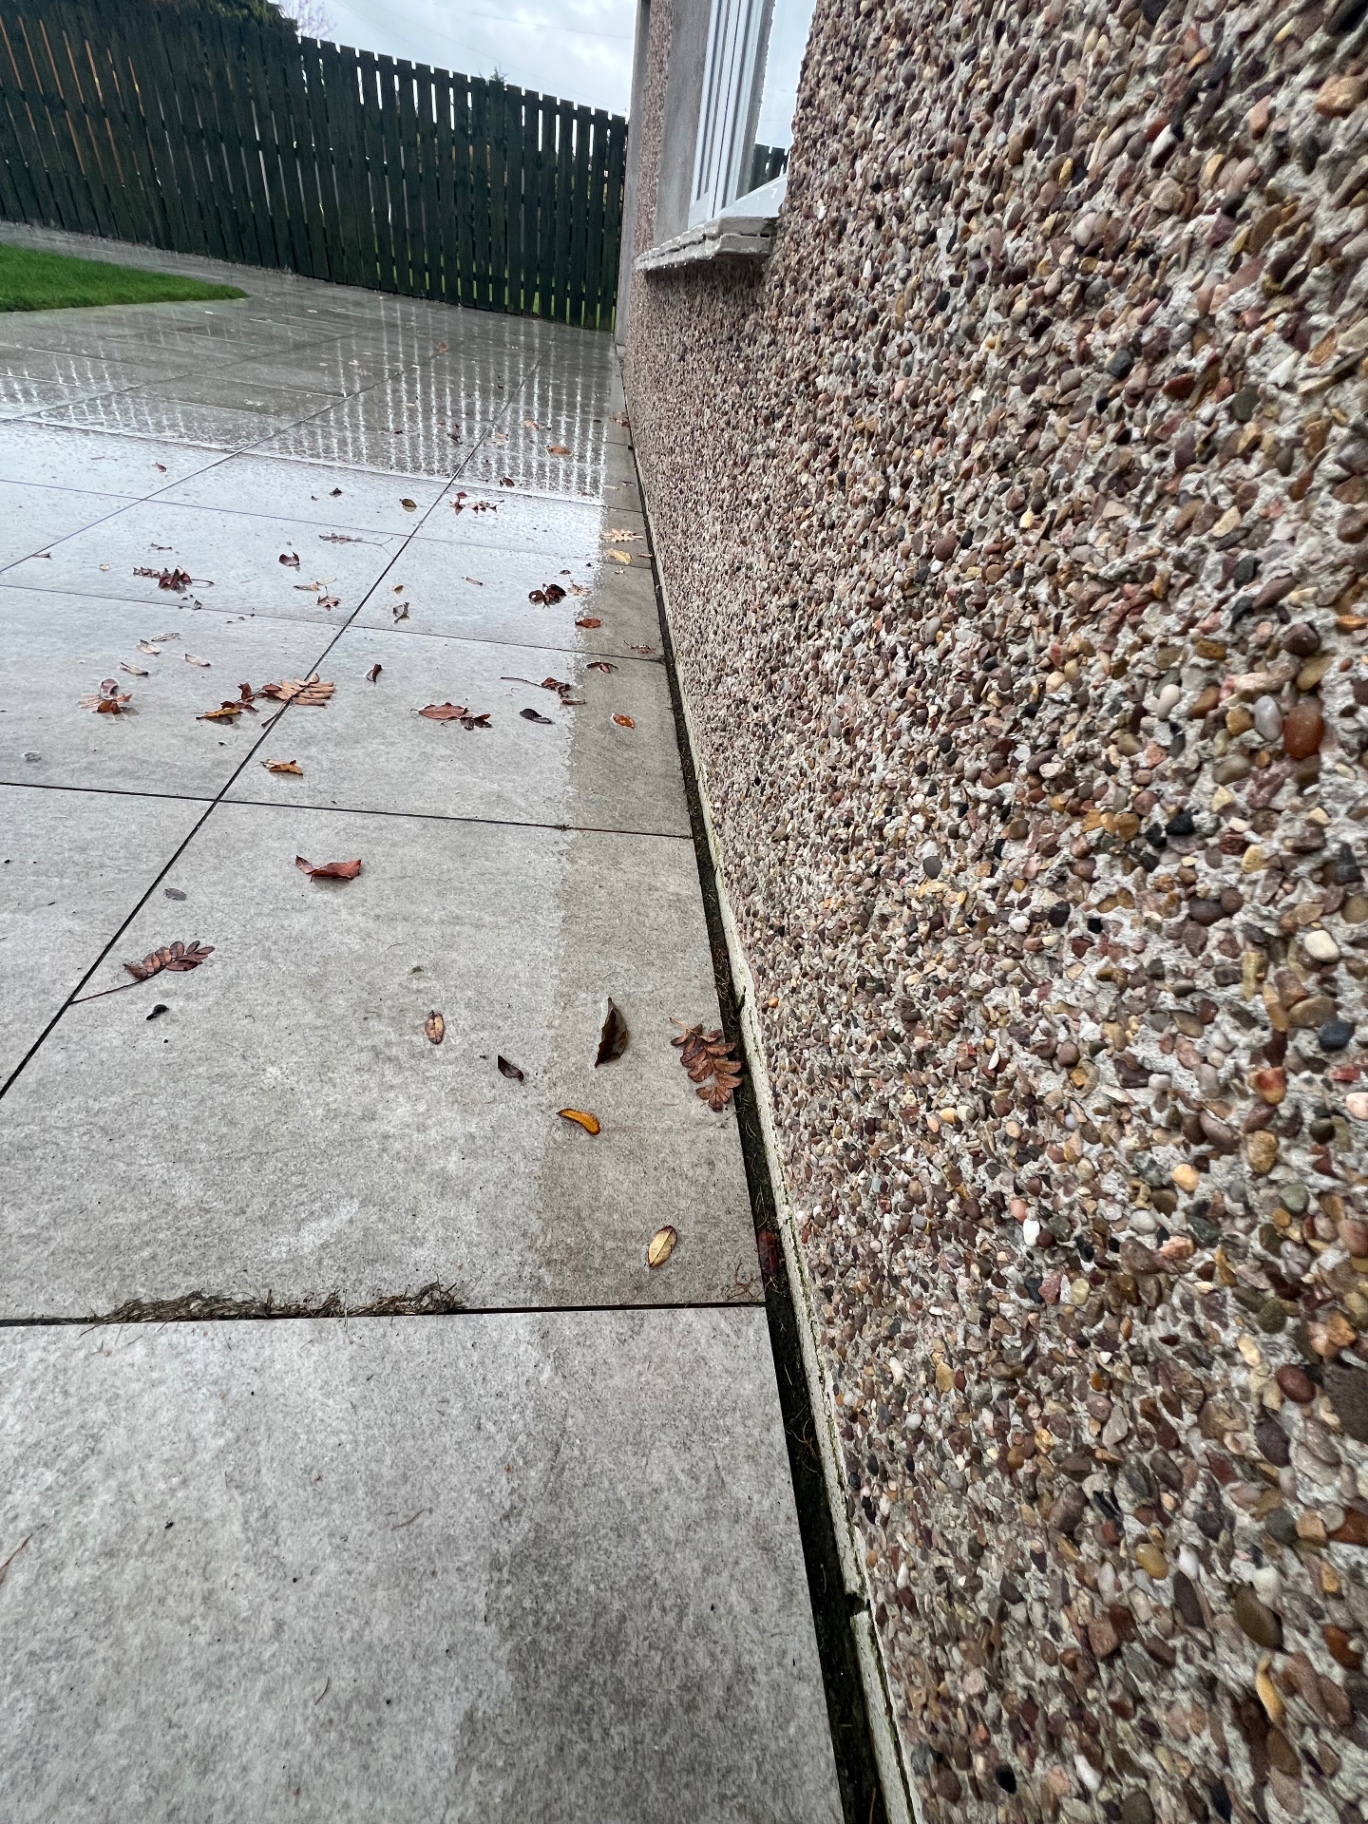
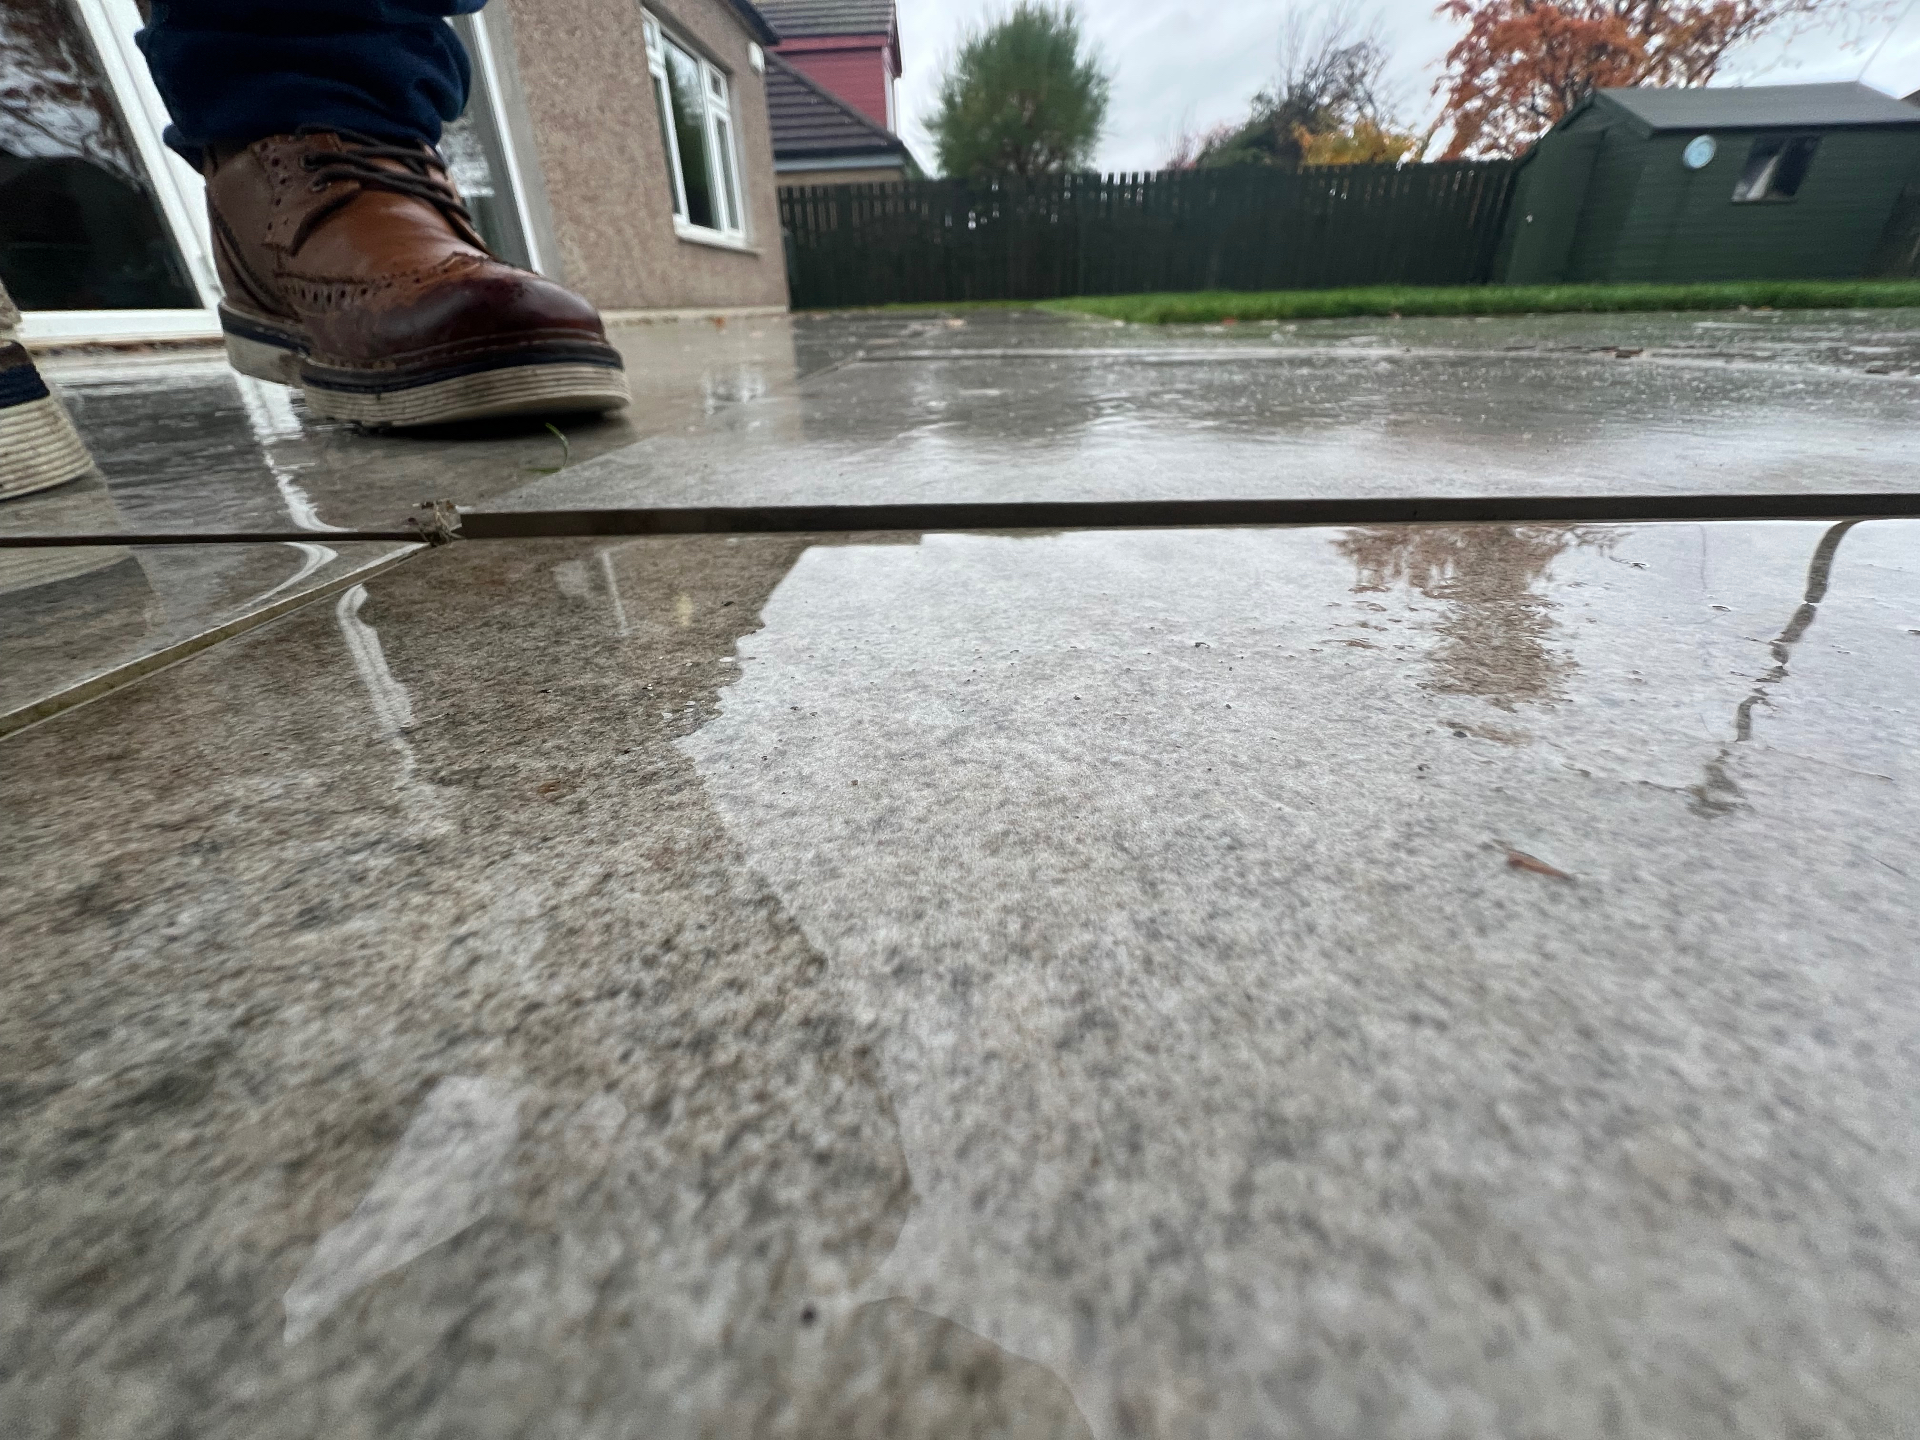
What You're Seeing: Standing water across the patio surface, visible puddles reflecting surroundings, water accumulation near the building wall.
The Problem: British Standard BS 7533 requires a minimum fall of 1:60 (approximately 17mm per metre) away from buildings. This installation has insufficient or incorrectly directed drainage gradient.
The Consequences:
- Constant surface dampness creating slippery, hazardous conditions
- Algae and moss growth in permanently wet areas
- Water penetration beneath tiles during freeze-thaw cycles
- Potential damp ingress to building walls
- Accelerated weathering and staining
In Scotland's climate (900-1,400mm annual rainfall), proper drainage is absolutely critical. We recommend 1:50 or 1:40 falls for optimal performance.
Problem 2: Poor Priming and Surface Staining
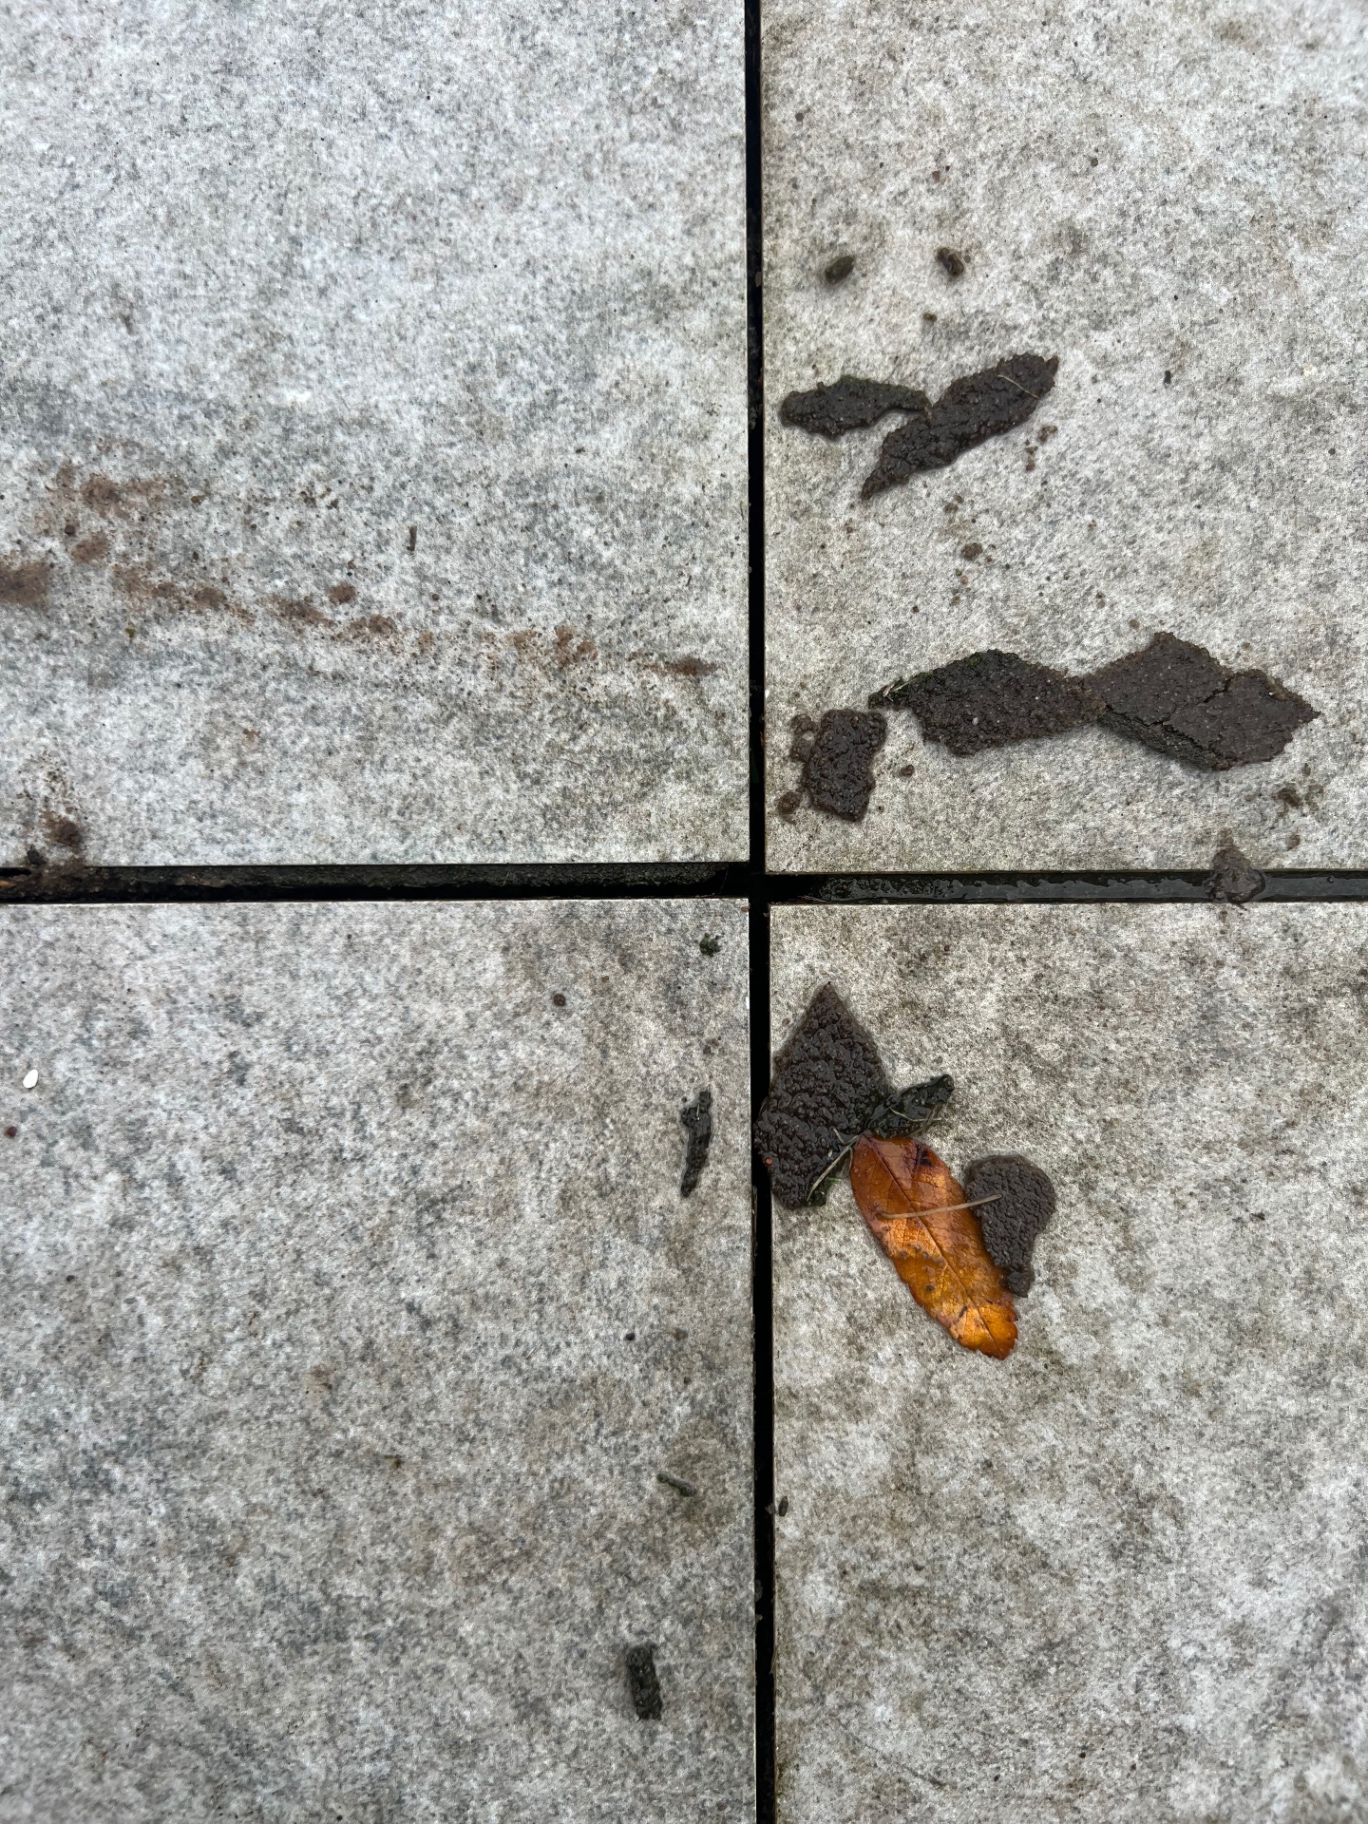
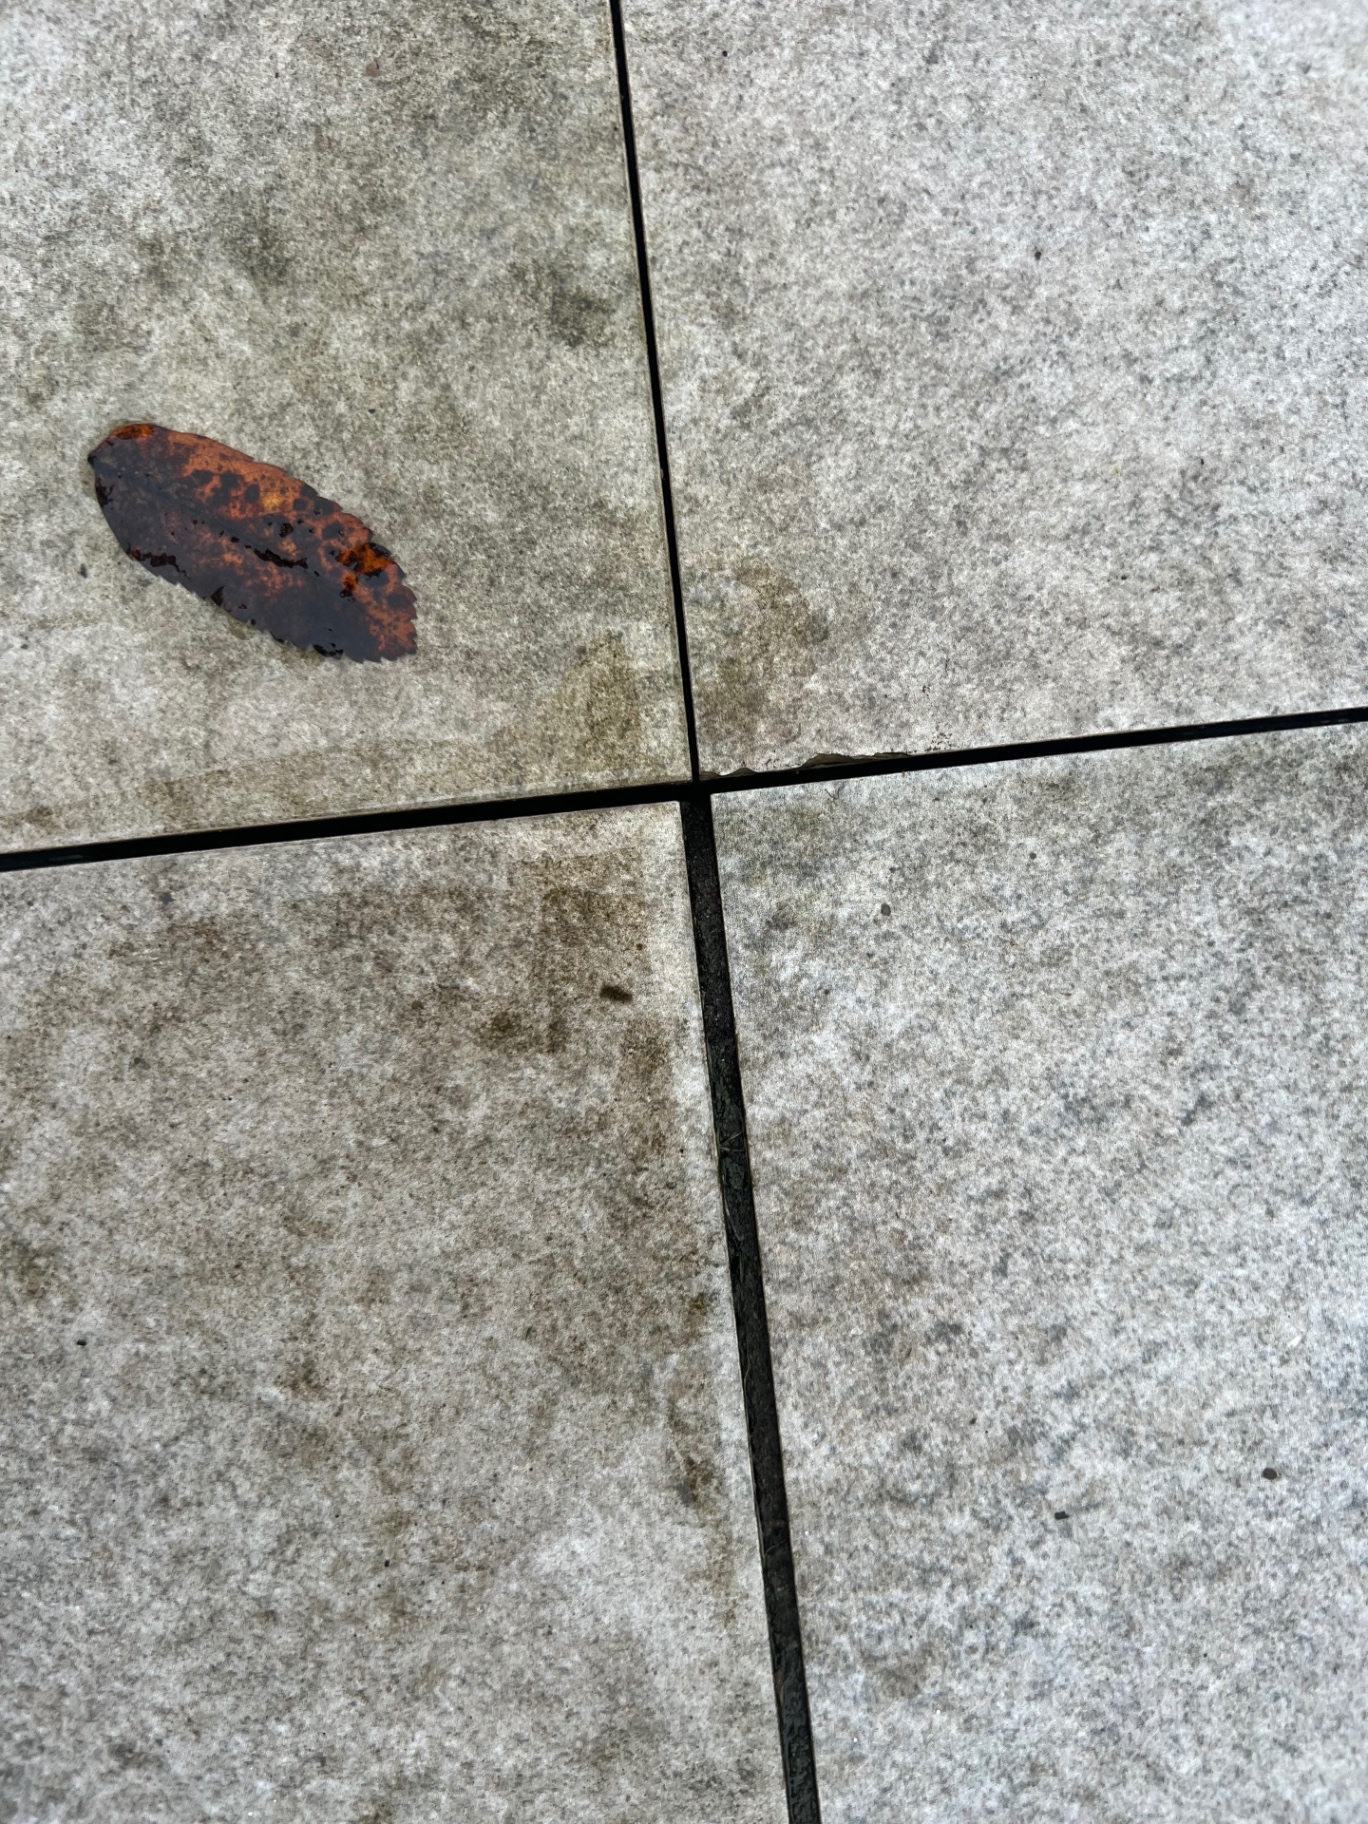
What You're Seeing: Dark patches and stains where cement mortar is visible through or bleeding onto the tile surface.
The Problem: Porcelain is non-porous and requires full-coverage slurry primer trowel-applied to every indentation on the tile back. This installation shows either no primer, inadequate primer coverage, or incorrect primer application (brushed rather than trowelled).
Why Priming Matters: Without proper priming, there's no mechanical bond between the tile and mortar. Water penetrates the interface, cement leaches to the surface, and tiles eventually debond and lift—especially during winter freeze-thaw cycles.
The dark patches you see aren't just cosmetic—they're evidence of complete installation failure in progress.
Problem 3: Tile Lifting and Failed Adhesion
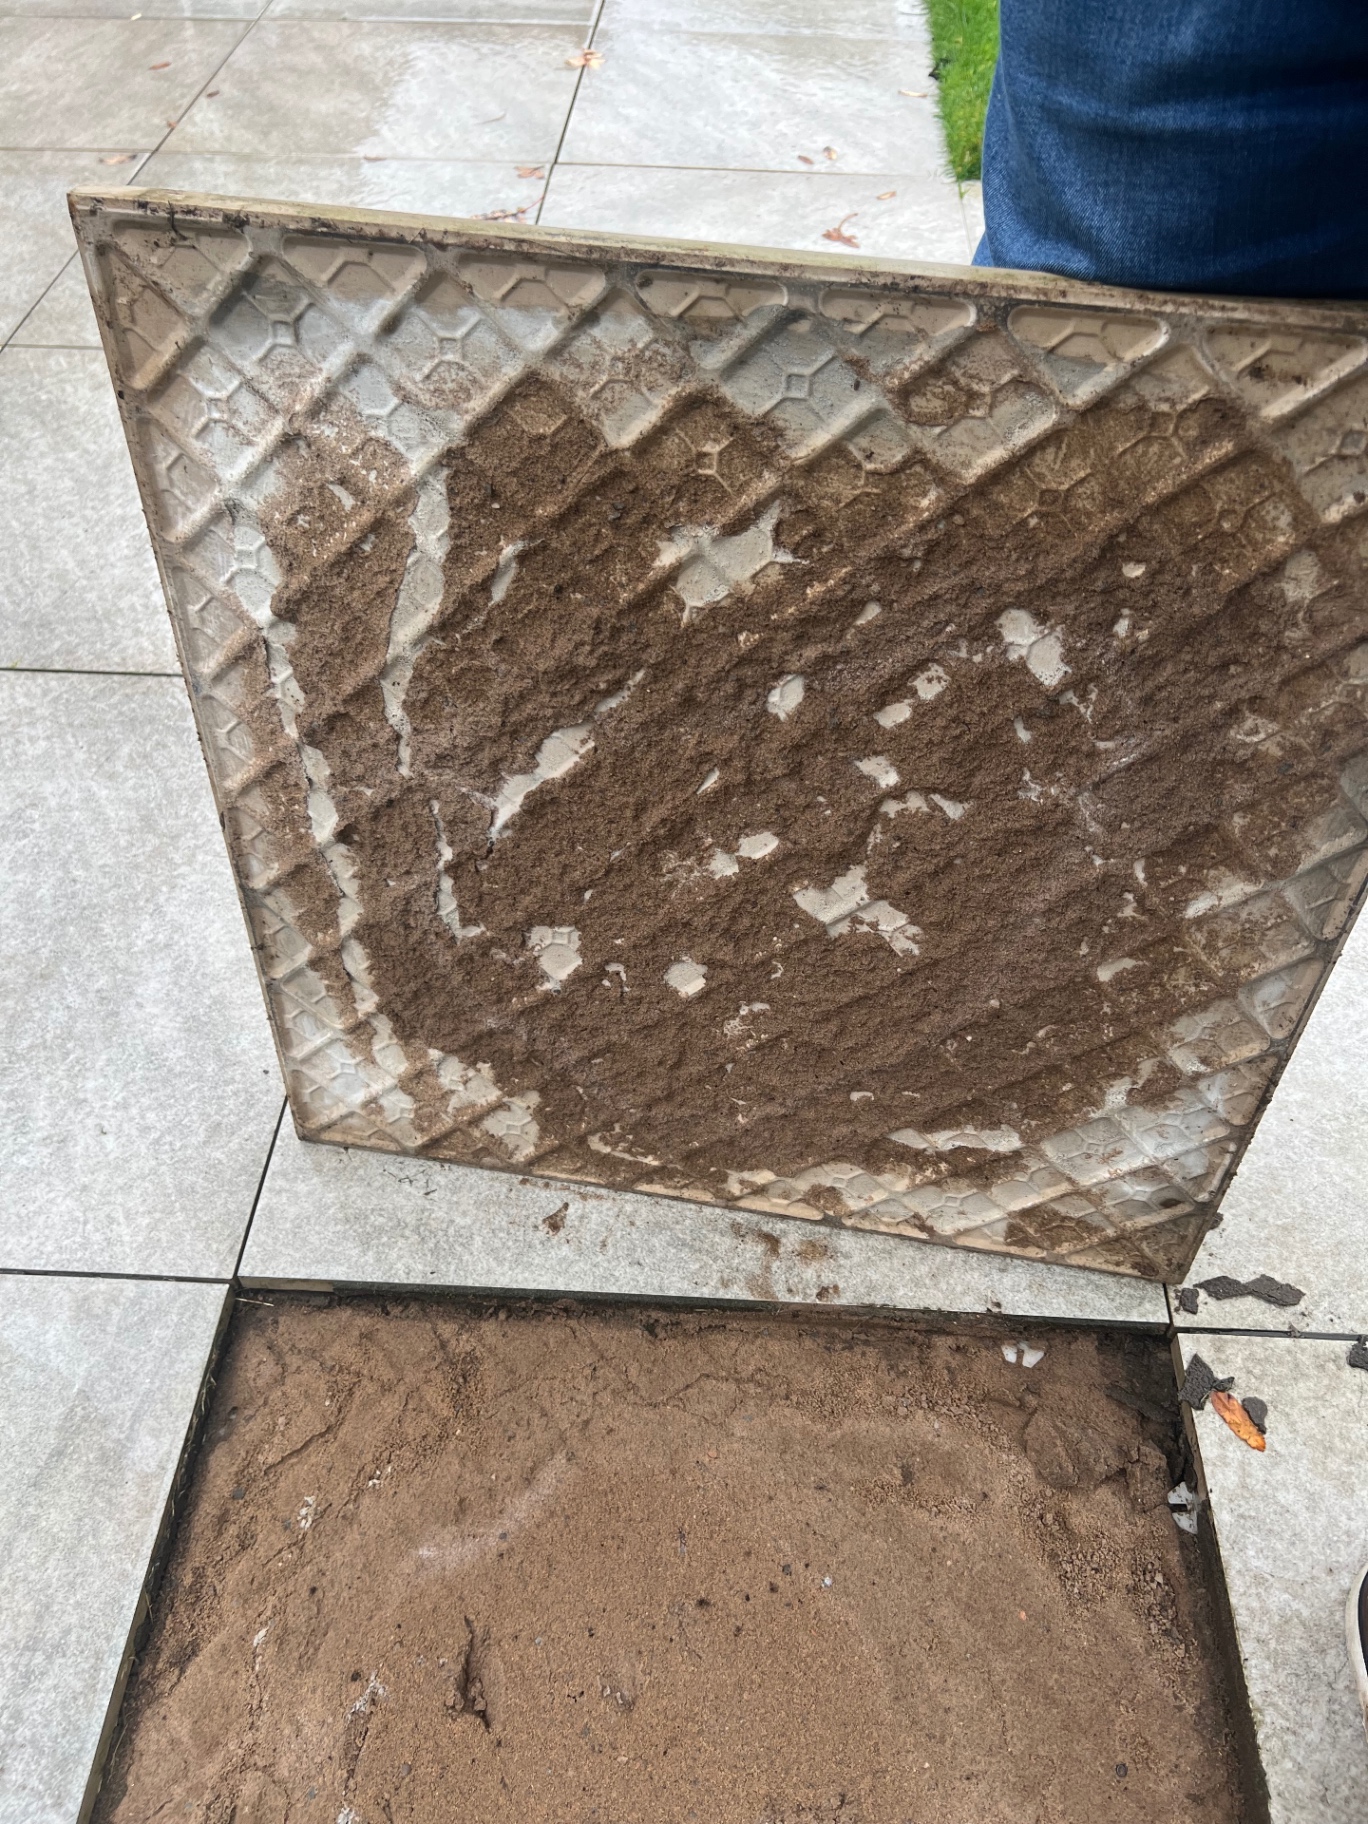
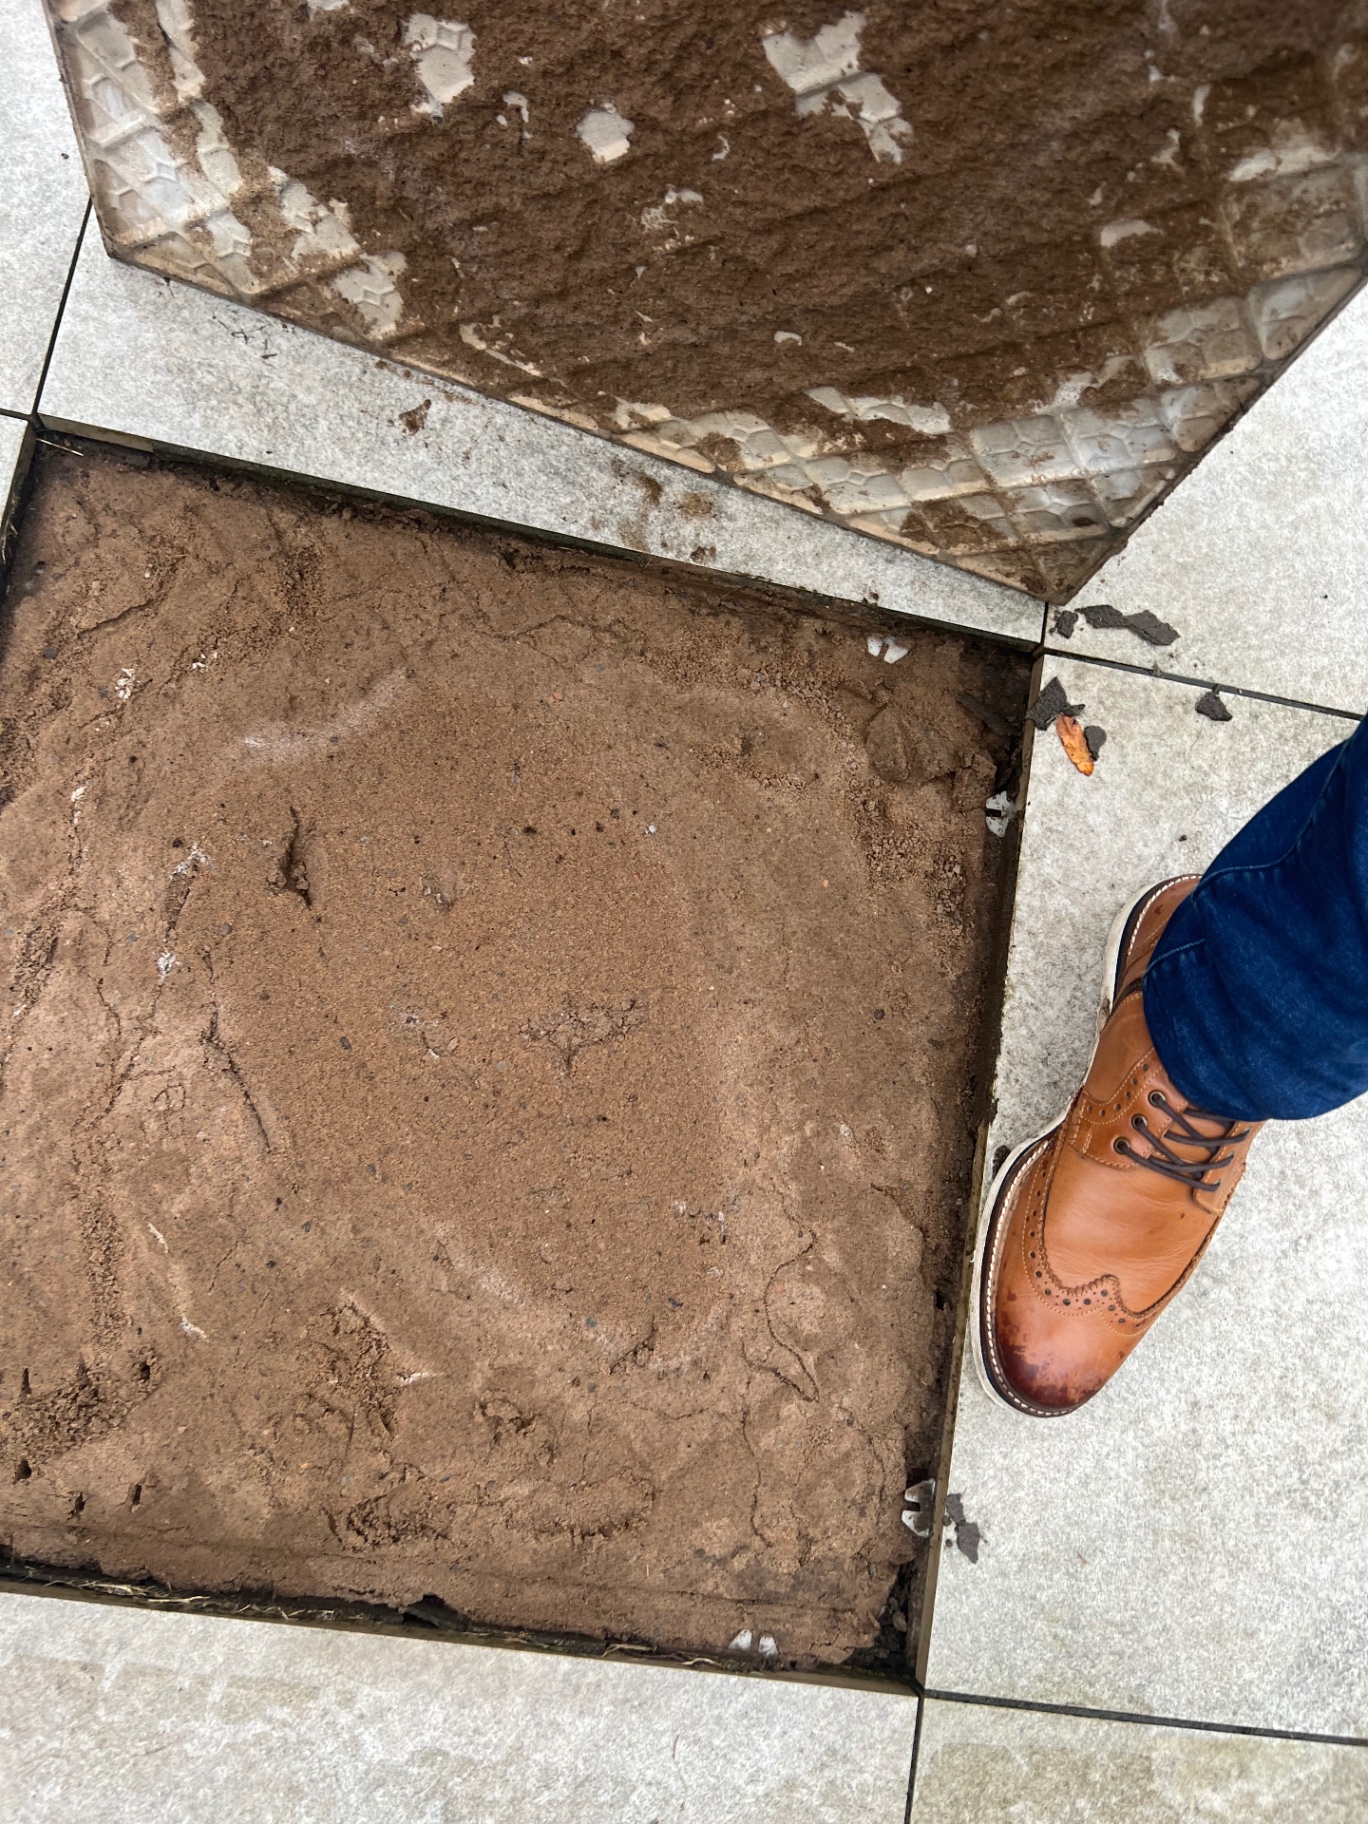
What You're Seeing: Lifted tiles revealing the underside with minimal mortar coverage, sandy/crumbly mortar mix, poor adhesion.
The Problem: Multiple critical failures:
- Inadequate Primer: Little to no bonding agent between tile and mortar
- Wrong Mortar Mix: Overly sandy or dry mix that doesn't adhere properly (should be 4:1 sand to cement)
- Insufficient Coverage: Partial bedding rather than full bed coverage required by BS 7533
- Poor Compaction: Voids beneath tiles allowing water ingress and movement
The Devastating Result: Once tiles lift and cement mortar bonds to the backs, they cannot be cleaned and reused. The homeowner faces complete replacement—new materials plus installation costs of £6,000-£9,000+.
The Correct Installation Method – BS 7533 Standards
Professional porcelain paving installation requires meticulous attention to every layer and process:
1. Foundation and Sub-Base (200-250mm depth)
- Excavation to proper depth below finished level
- Geo-textile membrane preventing sub-soil contamination
- 150mm MOT Type 1 sub-base compacted in layers
- 75mm minimum concrete base (C20/25 grade)
2. Drainage and Falls
- Minimum 1:60 fall (we recommend 1:50 for Scotland)
- String lines or laser levels for accuracy
- Direction away from buildings to drainage points
- ACO drains or soakaways where required
3. Priming Process
- Proprietary slurry primer (manufacturer-approved)
- Full trowel application covering every indentation
- Allow to become tacky before laying (5-15 minutes)
- Never brush or spray—trowel only for proper coverage
4. Mortar Bedding
- 4:1 sharp sand to cement ratio
- Semi-dry consistency that holds when squeezed
- Full bed application (30-50mm thick)
- No spot bedding or dot-and-dab methods
5. Quality Control
- Continuous level checking during installation
- Proper tile spacing (typically 3-5mm joints)
- 48-hour minimum cure before traffic
- Resin-based jointing compound (not sand)
Questions to Ask Before Hiring an Installer
Protect your investment by asking potential installers:
- Do you follow BS 7533 standards? (If they don't know what this is, walk away)
- What training do your teams have in porcelain installation? (Look for manufacturer certifications)
- What primer products do you use? (Should specify manufacturer-approved slurry primers)
- How do you ensure correct drainage falls? (Should mention laser levels or string lines)
- What guarantee do you offer? (Minimum 10 years, preferably lifetime)
- Can you provide references for recent porcelain projects? (Ask to visit completed installations)
- What sub-base preparation do you include? (Must include concrete base, not just MOT Type 1)
The True Cost of Getting It Wrong
A botched installation doesn't just look bad—it becomes exponentially more expensive:
- Original Poor Installation: £9,000 (67.5m²)
- Removal and Disposal: £800-£1,200
- New Materials: £4,500-£6,000 (old tiles unsalvageable)
- Proper Reinstallation: £5,000-£7,500
- Total Cost: £19,300-£23,700
You essentially pay twice—or more—for the same patio.
Why Choose Maybury Landscaping
At Maybury Landscaping, porcelain paving installation is a specialised skill we've perfected through manufacturer training, BS 7533 adherence, and years of experience in Scotland's demanding climate.
Our Guarantee
- ✓ Lifetime workmanship guarantee
- ✓ BS 7533 compliant installation
- ✓ Manufacturer-approved materials only
- ✓ Full photo documentation
Our Process
- ✓ Trained, certified installers
- ✓ Proper drainage engineering
- ✓ Full-coverage primer application
- ✓ Quality-controlled mortar mixes
We're so confident in our methods that every porcelain installation includes our Lifetime Guarantee—something only possible when work is done right the first time.
Get Expert Advice Before You Commit
Considering porcelain paving for your Edinburgh, Livingston, Falkirk, or Stirling property? Don't risk your investment with unqualified installers. Our team provides free consultations where we'll:
- Assess your site's specific drainage requirements
- Explain our BS 7533-compliant installation process
- Show you examples of previous porcelain projects
- Provide a detailed, fixed-price quotation
- Answer all your questions about materials and methods
Frequently Asked Questions
What is BS 7533 and why does it matter for porcelain paving?
BS 7533 is the British Standard for design and construction of pavements constructed with clay, natural stone, or concrete pavers. It specifies proper installation methods including sub-base preparation, bedding layers, drainage falls, and jointing. Following BS 7533 ensures your porcelain patio will be durable, safe, and long-lasting.
Why does porcelain paving need a primer?
Porcelain is non-porous, meaning it doesn't naturally bond with cement-based mortars. A slurry primer creates a mechanical bond between the tile and bedding layer. Without proper priming, water penetrates beneath tiles, leading to lifting, movement, and eventual failure—especially during freeze-thaw cycles in Scottish winters.
Can porcelain tiles be laid on sand like traditional paving?
No. Unlike natural stone or concrete pavers, porcelain must be laid on a full bed of cement-based mortar over a concrete base. Spot bedding (dot and dab) or sand beds do not comply with BS 7533 and will result in rocking, cracking, and premature failure.
What drainage fall is required for porcelain patios?
BS 7533 requires a minimum fall of 1:60 (approximately 17mm per metre) away from buildings. In Scotland's high-rainfall climate, we recommend 1:50 or 1:40 for better water runoff. Inadequate falls cause water pooling, surface staining, algae growth, and frost damage.
How much does it cost to fix poorly installed porcelain paving?
Complete re-installation typically costs as much or more than the original job. For a 67m² patio, costs can range from £6,000-£9,000+ including removal, disposal, new materials (as old tiles often can't be reused due to cement adhesion), proper preparation, and reinstallation to BS 7533 standards.
Can lifted porcelain tiles be re-laid?
It depends on the condition. If cement mortar has bonded to the tile backs, it's nearly impossible to clean off without damaging the tiles. Fresh tiles with minimal mortar adhesion might be salvageable, but most failed installations require complete replacement of materials.
What is the correct mortar mix for porcelain paving?
A typical mix is 4 parts sharp sand to 1 part cement (4:1 ratio). The consistency should be semi-dry but hold together when squeezed. Overly dry or sandy mixes won't bond properly; overly wet mixes cause slabs to sink or move during installation.
How long should porcelain paving last when installed correctly?
When installed to BS 7533 with proper priming, drainage, and sub-base, porcelain paving should last 25-35+ years with minimal maintenance. Premium installations with high-quality primers and expert workmanship can exceed 40 years.
What qualifications should porcelain paving installers have?
Look for installers with manufacturer-approved training (such as Marshalls or Tobermore certification), demonstrable knowledge of BS 7533 standards, experience with porcelain-specific techniques, and comprehensive workmanship guarantees (minimum 10 years, preferably lifetime).
Does Maybury Landscaping offer guarantees on porcelain paving?
Yes. All our porcelain paving installations are backed by our Lifetime Guarantee, covering workmanship and installation methods. We only use manufacturer-approved primers, follow BS 7533 standards, and provide full photo documentation of every installation stage.
About Maybury Landscaping: Serving Edinburgh, Livingston, Falkirk, Stirling, and surrounding areas (EH & FK postcodes), Maybury Landscaping specialises in premium driveways, patios, and garden transformations. Every project is backed by our Lifetime Guarantee and completed to industry-leading standards. Contact us today for expert advice and transparent pricing.